Facebook Live enables you to connect and interact with your audience in real-time. This makes it an extremely helpful tool for brands and businesses around the world.
Since its launch in 2016, Facebook live streaming has gained popularity. Nowadays live video is popular not just for large broadcasting networks. It is also for small brands and aspiring game streamers alike.
In this article, you will learn the beginner’s guide to Facebook live.
What Is Facebook Live?
Facebook Live is a live video streaming Feature of Facebook social network. It allows you to broadcast a live video using your camera on a computer or mobile device. Facebook recently stated that ‘live video on average gets six times more interactions as regular video’.
Once a Facebook Live video is recorded it will stay on your profile or page for viewers to replay it. Facebook has recently updated It’s ranking algorithm to show more live videos that are streaming live.
Streamers using Facebook Live have the option to create a customized audience. Followers can get a notification when a streamer is going live.
How To Go Live On Facebook?
Facebook Live was a mobile-only feature. Because of the growing popularity of the live feature, Facebook also made the feature available on desktop computers. In this article, we’ll guide you on how to stream live on both devices below.
Mobile
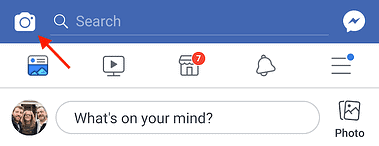
1. Click the camera icon in the top left – Open the Facebook App. You will see a camera icon in the top left corner and click it to open your camera. You can also open up the live feature on your Facebook profile. Click your status bar, then select the “Go Live” option from the menu.
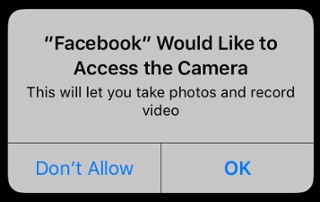
2. Allow Facebook access to your camera and microphone – You will be notified to give Facebook access to your camera and microphone. If you will not give access you will not be able to go live. Once you allow access for the first time you won’t be notified to give access to Facebook the next time you go live.
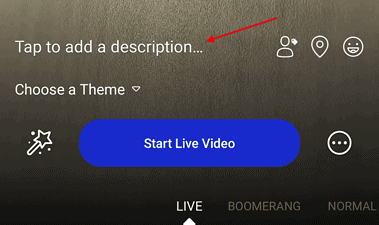
3. Write a description – The description will show up on your follower’s timelines above your video. Make sure you write an attention-grabbing headline and tell them what your live stream is all about.
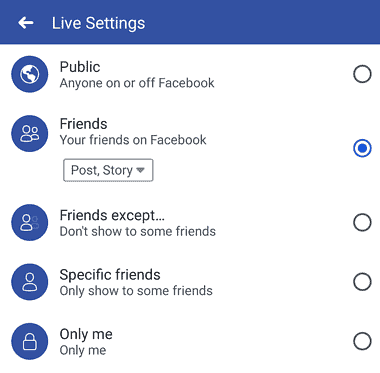
4. Choose your privacy, location, and posting settings – You can choose an audience for your Facebook Live stream by choosing from the privacy settings. Click the “To:” button on the top left of the screen and you can choose from “Public,” “Friends,” “Friends except…,” or “Friends of friends.” and “Only Me”. It is advisable to choose the Public setting so that anyone can share and see your Facebook Live stream. If you are posting from a Facebook business page, your Facebook Live stream will be set to public automatically. You can also restrict your audience by location using Facebook’s audience restrictions. To do this click on the Audience Restrictions on the bottom right corner. Turn “Geo Controls” on and use the locations tab to select the location you want to exclude or include in your live stream.
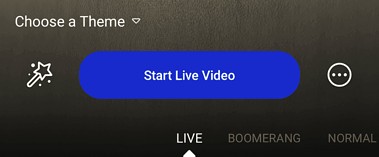
5. Add lenses, filters, or writing and drawing to your video – Click the magic wand icon at the left of the “Start Live Video” button. Choose any lens, change the filter of the camera, and draw or write anything on the screen. Facebook offers a variety of lenses and filters. If you decide to put filters and lenses make sure to use those that will complement your stream and not distract your audience.
6. Click the “Start Live Video” to start broadcasting – Once you click the “Start Live Video” You will see a countdown and then you will be live. Your live stream will appear in your news feed and your followers will be able to see it. Facebook Live streams on mobile can be up to 4 hours. The longer you live stream, the more people are likely to see your video and watch your broadcast.
7. Interact with your audience – Once you are live make sure to interact with your audience by answering questions and comments while you are live. While you are broadcasting you can see the comments and number of viewers at the bottom of your video feed. They will appear in reverse chronological order, the oldest ones will be on top. You also have the ability to block a viewer by clicking their picture next to their comment and click the block.
8. Click the “Finish” button to end your live stream – Once you click the finish button the video will be on your page or timeline like any other regular post. You can also delete it if you don’t want it replayed by your audience.
Congrats! You just created your first Facebook Live broadcast!
Desktop
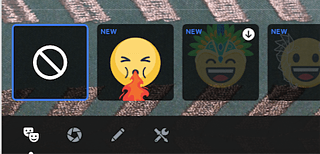
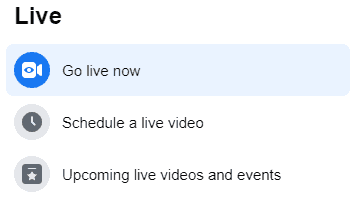
1. Go to your Page on Facebook and click the “Live” button, on the “Create” tab – When you get to your Facebook page you will see the create tab with 4 different buttons. Click the button that is labeled “Live” and it will lead you to another page.

2. You go to the Live Producer page – On the Live Producer page, this is where you set up all of the details for your live stream. It is more detailed than the mobile counterpart. You can set up your Facebook live stream more professionally.
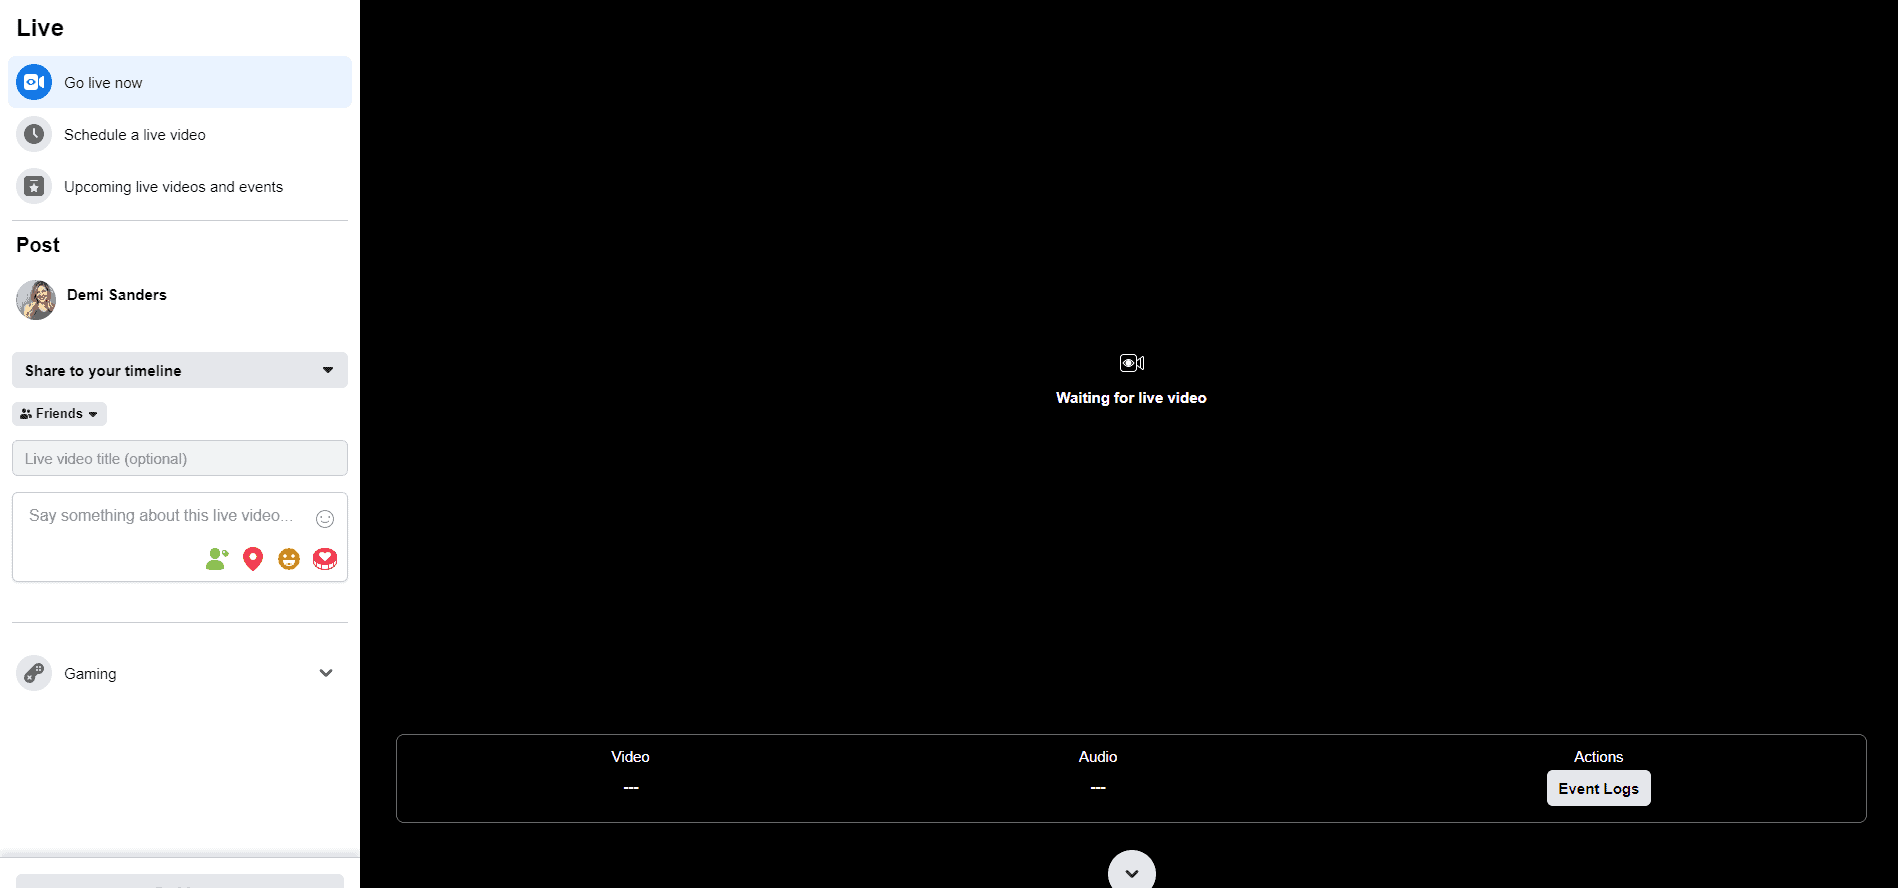
3. Choose from the 3 settings to run your Facebook live stream – Using a stream key lets you set up your stream on a third party software like OBS(Open Broadcaster Software). Using the Camera lets you run your stream directly on Facebook. Using the paired encoder is much more advanced so we will tackle that on a more advanced tutorial.

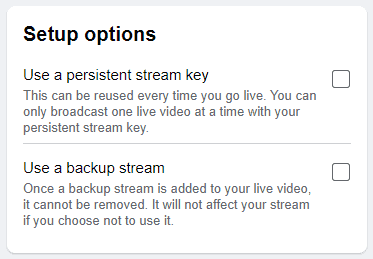
4. Choose an option for persistent stream key – If you check this box, this means you can reuse your stream key on your next live stream without generating a new key every time.
5. Choose if you need a backup stream – If you decide to check this box, you cannot uncheck it once you go live.
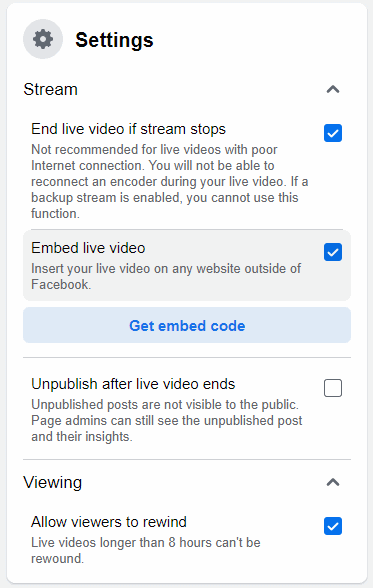
6. Set up the settings for “Stream”, “Viewing”, and “Comments” – This section is where you set up your stream, viewing, and comments settings. There are a bunch of checkboxes to choose from shown on the screenshot below.
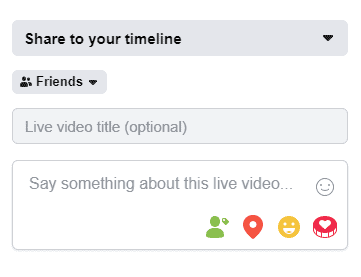
7. Check to make sure your description and video view are final before starting your broadcast – Write the description that best describes your stream. Make sure to catch the attention of the people following your page so they click and watch your live stream.
8. Press “Go Live Now” to start your broadcast.
The broadcast will appear in the News Feed and on your Page’s Timeline. You can edit it by tapping the drop-down arrow in the upper-righthand corner.
Conclusion
You are now ready to go live on Facebook. Make sure to enjoy your live stream and interact with your audience. People want to follow someone they can relate to. For a detailed article on building an audience, you can read our article here.